


First Grade - ELA
1: Environment

Unit 1: Habitats and Homes
Lesson 1
My Environment
Students are asked to label rooms in illustrated pictures (Activity 2, Option 2) and to circle items in the picture that meet basic needs of water, food, or shelter. The handwriting and Bb page pairs pictures (bathtub, bed) with words for tracing and copying, and Activity 2 (Option 1) has students add missing letters to picture-labeled rooms while following sounds. Students also draw and annotate their own room pictures (Activity 3 and Extension), linking images with written descriptions.
Lesson 2
What Is a Map?
The introduction asks students to examine several maps and explains that a map is a type of picture drawn as if looking down on a place. Activity 2 explicitly tells students that a map is different from a picture and notes that objects on maps are often labeled with words that describe them. Several activities have students locate items on map illustrations and add or read labels (options to fill in scrambled labels or to label items on a floor plan).
Lesson 3
Guide to Animal Habitats
Students are asked to point to the title, author's name, and illustrator's name on the book, identifying elements presented in the cover text. Students listen to the story read aloud and are prompted to stop and point out the animals and plants in each habitat and to count how many animals they can find, using illustrations to locate information. Students examine illustrated pages when choosing a habitat and may draw or describe what they see, which has them extract information from pictures.
Lesson 4
Animals Live and Grow
The lesson asks students to read Up in the Garden and Down in the Dirt and answer Question #1: "What season is it on the first page in the book. How do you know?" which prompts students to cite visual cues (snow, coats) to support their answer. Activity 1 (Option 1) has students draw pictures of plants and animals and label them, and Activity 4 includes a labeled Plant Art illustration that asks students to match plant parts to images. Activity 2 directs students to analyze the living things they recorded in Activity 1 and to find organisms that provide food for others, using both the book (text) and pictures/labels from their pages.
Lesson 5
Discovering Animal Habitats
Students are asked to look at pictures and words for the six habitats and "discuss what you see," including identifying and describing the animals in the pictures while attempting to read the habitat words (Activity 1, Options 1 and 2). Students label habitat illustrations from a word box and read the habitat names before matching them to pictures (Activity 1, Option 2). Students create and interpret a pictorial graph where pictures represent counts and labels/titles on the axes are read and explained (Activity 6), and an external link directs students to read captions under photos to identify animals.
Lesson 9
Animal Designs
In Activity 1 (Option 1) students are asked to name the animal and the habitat in each picture, then the teacher reads the caption in each box and the student analyzes the animal in its habitat and circles body parts that help the animal move. In Activity 1 (Option 2) students name and write the habitat shown in each box, read the movement word for each habitat, think of an animal that moves that way, act out the movement, and add or draw a picture of the animal. In Activity 2 students analyze pictures of habitats, decide which animals do not belong, circle them, and explain why each animal would not live in that habitat, linking picture evidence to verbal explanation.
Lesson 11
Amazing Me
The activity pages ask students to look at pictures (a snake, a flower, a hurt elephant) and then circle the face that shows how the picture makes them feel, and the directions tell students to review the words beneath each face and read them aloud. Option 2 asks students to record the emotion represented on each face and to write responses for how they feel about the pictured items. The skills list includes recognizing some words by sight, reading or attempting to read their own story, and illustrating a story, which leads students to connect written words with drawings.
Final Project
Animal Research / My Environment
Students are asked to create books in which their illustrations must "match the description at the top of each page," requiring them to produce pictures that correspond to written prompts. Students draw or paste pictures from magazines or the Internet and are asked to "help your child label his pictures," connecting text labels to images. Students also complete a map activity ("Shade the regions on the globe where the animal is found") that requires using a visual to show information referenced by the page prompt.
Unit 2: Weather
Lesson 1
Reading the Skies
Students draw lines from weather words to corresponding pictures (Activity 2, Option 1) and write vocabulary words beneath weather illustrations (Activity 2, Option 2), directly pairing words with images. Students make daily entries on a weather calendar by drawing pictures to reflect the weather and record observations, and they are asked to look at the cover of a book and predict what the story is about from that picture. The wrapping-up activity asks students to look at pictures of different weather and describe what they see, linking visual information to descriptive words.
Lesson 2
Types of Precipitation
Students are asked to find and describe habitats in the pictures from Oh Say Can You Say What's the Weather Today? (Activity 1), which requires using illustrations to describe weather. In Activity 2 students read the words for types of precipitation and then look closely at three pictures to decide which precipitation is shown, labeling pictures with R, S, or H or writing the words to match images. The student activity pages explicitly present images of hail, snow, and rain for students to inspect and label, linking visual information to vocabulary words.
Lesson 3
Measuring and Charting Weather
Students use a printed thermometer image on the "Measuring Temperature" activity page to record and color the degrees for ice, tap, and warm water. Students follow step-by-step illustrated directions on the Cactus Craft and Sock Cactus pages, with drawings showing materials and actions. Students are asked to look at Crinkleroot's book and describe what the weather can be like in different habitats, which involves referring to book content (likely pictures and words).
Lesson 5
Fall
Students are asked to look at the "It's Fall!" illustration and answer pointed questions about what people are wearing, what the plants and trees look like, what people are doing, and what the sky looks like. Students circle three items in the picture, write the names of those items, identify beginning letters, and use each word in a sentence, linking picture details to written words. In the Graphing Leaves activity, students color leaves, place them on a pictorial bar graph, and answer questions about what the graph (a visual) shows versus counts given by the labels.
Lesson 6
Winter
Activity 1 asks students to find pages that look like winter and to describe what they see in the pictures and how those pictures are similar to or different from their own winter environment. Students dictate a story, have words recorded (or write them), then illustrate the story in the provided box and attempt to read the story aloud. The student page prompt "In the winter I _____" plus the vocabulary box (COLD, SNOW, FREEZE) links written words with student drawings.
Lesson 7
Spring
Students are asked to attempt to read each poem and then say what the poem was about, prompting them to use the words to derive meaning. Students are asked to draw a line from each poem to the picture that best tells the story (Option 1) or to create illustrations that help tell each poem (Option 2), requiring them to connect text and images. Students work directly with pages that pair short poems and accompanying illustrations, giving opportunities to compare picture information with poem text.
Lesson 8
Summer
Students are asked to describe the environment and actions in the "Summer Fun" picture and to explain whether activities could occur in winter (Activity 1), which requires interpreting information in an illustration. Students use picture–word prompts to fill blanks in "A Summer Story," selecting words based on picture cues and text context (Activity 2). In Option 2 students are prompted to illustrate the completed story, linking drawn information to the written passage.
Final Project
Weather Games
Students play the "Weather Memory" game in which they must match a season or weather word card with a corresponding picture card, directly linking written words to illustrations. In Activity 1 students label pictures with the season name and glue clothing pictures onto the scene, practicing matching words (season names) to pictorial cues. In Activity 3 students look through a picture book and pick the page that most closely matches the current outside weather, comparing visual information in the book to real-world conditions.
Unit 3: Community
Lesson 1
On the Town
Students are asked to look at the cover of On the Town and predict what the book might be about, using the picture as a cue. In Activity 2 students select pictures that complete written sentences (Option 1) or use pictured vocabulary while filling in sentences with words (Option 2), linking illustrations and words. In Activity 3 students draw a new page and then write or dictate a sentence about that place, pairing their own illustration with text. Activity 4 provides illustrations alongside tracing and writing of words (e.g., park, people) so students practice connecting images and written labels.
Lesson 2
My Community Environment
Students are asked to look through books and describe communities found in the illustrations (Activity 3), selecting three books, copying titles (words), and drawing simple illustrations of each community. In Activity 1 students read Me on the Map and examine the town map page, pointing out streets, buildings, and a river. In Activity 2 students take photographs of community buildings, print them, label the pictures, and write or dictate brief descriptions of how each place serves the community.
Lesson 3
Jobs in the Community
Students look at illustrated community workers and read or attempt to read the name labels (Activity 1 Options). They draw lines from pictures of workers to their workplaces and are encouraged to draw symbols above names (Option 2), which requires using illustrations alongside words. Students also write simple sentences about how each worker helps (Activity 5) and use chart pages that pair icons/illustrations with helper names when tallying sightings (Activity 2).
Lesson 7
A Citizen with Character
Students view and evaluate pictures in the "Kindness Award" activity by assigning stars and explaining why they chose each score, requiring them to extract meaning from illustrations. In Activity 5 (The Boy Who Cried Wolf) students read text that includes a small illustration and Option 1 asks students to create drawings for the beginning, middle, and end and then write or dictate a sentence to accompany each picture. Several activity pages include images (Kindness Award, The Boy Who Cried Wolf, handwriting Kk graphics) that students use as part of comprehension and response tasks.
Lesson 9
Caring for Our Communities
Students are asked to study an activity sheet illustration while an adult reads the story "When One Person Cares," linking picture study with the written text. Students look at the two community pictures on the "Where Would You Want to Live?" page and mark Xs or circles to identify good and bad features shown in the illustrations. Students examine the pictures on the "Helping Others in the Community" sheet and discuss how the citizens are helping one another, and an extension asks them to look through picture books and discuss story settings shown in illustrations.
2: Similarities and Differences
Unit 1: Amazing Attributes
Lesson 4
How Does It Feel?
Students are shown illustrations of objects (pillow, soap, juice box, brick) and are given a word box of texture adjectives to match to each picture (Activity 2, both options). Students are asked to write or copy a sentence about an object's texture (Activity 3) and to name texture words during review, connecting descriptive words to pictured objects. The introduction explicitly ties texture words to helping readers picture or imagine objects.
Lesson 5
How Old?
Students are asked to look at pictures of people and trees and decide who looks older or younger, and to cut out or sort pictures from magazines by perceived age. Students match numeric ages (numbers on the page) to pictured people by finding the largest and smallest numbers and drawing lines or pasting numbers beside pictures. Students are prompted to discuss what visual cues (height, trunk thickness, size) they use to judge age and to decide whether those cues accurately reflect age.
Lesson 6
The Measure of Things
Students use illustrations to make measurement judgments in multiple activities (e.g., they circle the heavier object on the "Which Weighs More?" page using pictures of items on balance scales). The Length and Measuring with a Ruler pages present pictures of objects (toothbrush, pencil, spoon, crayon, etc.) that students must measure and record, and the Finding Capacity page uses icons (sugar bag, milk carton, water tap) for students to estimate and then measure capacity. The Length activity explicitly allows students to either draw pictures or write words when completing summary sentences, connecting pictorial and written representations.
Lesson 7
More Attributes
Students label Venn diagram circles with written words such as "yellow" and "triangle" and then place physical blocks into the visual Venn diagram, linking the words to the picture-based diagram. The Student Activity Page shows overlapping circle illustrations (Venn diagrams) alongside tracing and writing the word "Venn," so students encounter both pictures/diagrams and words in the same tasks. In Activity 4 students sort toys into yarn-circle Venn diagrams that are headed by written category labels (e.g., "Soft Parts" and "Hard Parts").
Lesson 10
Earth Materials: Rocks, Soil, and Water
Students are asked to locate and describe items shown in illustrations (e.g., "Can you describe any liquids pictured in the book?" and "Can you find any rocks in the illustrations?"). Students are prompted to match glossary entries to illustrations ("Encourage him to find each animal described in the illustrations") and to compare visual elements across texts (compare the two covers and whether they share an illustrator). Students use illustrations to complete language tasks (look through the book to fill preposition sentence blanks) and match rock images to names in the Earth Materials book project.
Final Project
Presenting Attributes
The poster option asks students to draw or use pictures, stickers, or online images to explain attributes (Option 2, Step 1). The poster instructions tell students they may use words and sentences on the poster to represent attributes (Option 2, Step 3). Students are asked to practice by presenting the poster and describing each part and what it teaches (Option 2, Step 5), which requires referring to both images and text when explaining attributes.
Unit 2: Senses
Lesson 1
My Five Senses
Students are asked to examine the book cover and answer questions about the title, author, and what they think the story might be about, prompting use of visual cues to make predictions. The Senses Word List pairs simple illustrations with labels (tongue–taste, ear–hear, etc.), and students copy the words and refer to the list when they encounter words in the text, linking images and printed words. In the Senses Web activity students cut out pictures (or words) and place them on webs for each sense, using visual images and/or words to categorize items by sensory attributes.
Lesson 4
Hearing and Seeing
Students cut out and glue labels for the main parts of the eye and the ear diagrams (Activities 2 and 6), directly pairing written terms with corresponding illustrations. Students view the cover and pictures in The Magic School Bus Explores the Senses while answering comprehension questions (Activity 1) and use student pages that show images (eyes, ears) alongside words (Activity 8). Students also use diagrams to trace light and sound pathways, linking visual representations with written or oral explanations (Activity 3 and Activity 6).
Lesson 5
Touch
Students view pictures of objects (coffee pot, bowl of noodles, ice, fish, pillow, oven, rock, bubbles) and match or label those images with descriptive words on the "Touch It" and "Touch Chart" pages. Students write or select adjectives (warm, hard, wet, hot, cold, soft, etc.) to describe the pictured items and draw and label their own objects on the chart. The handwriting page pairs the words "taste" and "touch" with small illustrations, and activities ask students to record sensory descriptors while making Jell-O or feeling items in a bag.
Lesson 7
Using All of Our Senses
Students are asked to read pages of My Five Senses and then say which senses the boy used and how he used each sense, and the text explicitly tells students to "look at the pictures and words with her eyes." In Activity 1 (Option 1) students examine illustrated scenarios and identify which senses are used based on the pictures. In Activity 3 students look through books and identify ways characters are using their senses, which encourages attention to illustrations in storybooks.
Lesson 8
Writing About Our Senses
Students read or hear descriptive clues (words) and use pictures to identify items in the "Sensing Logic" activity, crossing out pictures that do not match the verbal descriptions. Students draw popcorn before and after popping and complete fill-in-the-blank sentences about how the popcorn looked, felt, smelled, sounded, and tasted, linking illustrations and written sensory words in "A Sensible Report." Students illustrate a memorable event and then write sensory words for each of the five senses in "Sensing My Day," and they are asked to look through books to identify sensing words authors use.
Final Project
A Sensible Party
Students view Student Activity Pages that include icons/illustrations for each sense alongside written labels and idea/supplies text. The instructions ask students to read a sample Party Planner sheet and compare their own plan with the sample to find similarities and differences. The pages present parallel information in pictures (icons) and words (labels and descriptions).
Unit 3: We're the Same, We're Different
Lesson 2
Physical Characteristics
Students work with illustrated figures in Activity 1 by drawing, cutting, and pasting physical features and answering questions about hair, eyes, hands, and legs; Activity 2 asks students to listen to a written story about Susan and Casey and then sequence illustrated event boxes from the story; Activity 3 has students dictate a story and then illustrate the beginning, middle, and end to match their recorded sentences. These tasks require students to attend to both pictures (the paper-doll figures and story panels) and words (the read-aloud story, captions, and dictated sentences).
Lesson 3
Different Personalities
Students draw or paste pictures (Activity 2 and Activity 3) and then write or paste personality words around those images. The Student Activity Pages include cartoon faces and a pictured gesture for "quiet," which students trace and use alongside the word practice. Activities repeatedly pair illustrations or photos with descriptive vocabulary (e.g., pasting a picture of a character and recording personality words around it).
Lesson 5
Shapesville
Students are asked to look at the book cover and guess what the story might be about and to identify shapes on the cover, which requires using illustrations to make meaning. As the story is read, students identify each character's shape and describe physical characteristics (color, sides, angles, eye color), which are visual details. After reading, students review each shape's personality and interests from the text, prompting attention to information presented in the words.
Lesson 6
Different Families
Students are asked to listen to and read pages from A Life Like Mine (Activity 1) and to look through the book to identify pictures of families (Activity 2). Students describe clothing, physical characteristics, activities, and interactions they see in the photographs and are prompted to draw illustrations representing basic needs. The lesson also includes a skill to "Connect information in text to personal experience," which has students work with both written sentences and images when comparing families.
Lesson 7
Different Homes
Students are asked to read pages 26–35 and identify and describe the different homes shown in the book, which directs them to use illustrations. Students are prompted to look at the materials used to make homes and to identify materials they recognize from the pictures. Activities 2 and 3 ask students to look through the book or online for pictures of homes and add visual details around the homes, and Activity 4 has students write a sentence about their home, linking words to their drawings.
Lesson 8
Different Holidays and Traditions
Students match holiday names with corresponding images on the "American Holidays and Traditions" activity page and glue holiday graphics onto calendar dates in the "What's the Date?" activity. Students draw a picture of themselves celebrating a holiday on the "My Favorite Holiday" page and then write or dictate three sentences describing the holiday. Students look online for pictures and descriptions of holidays around the world and answer questions about activities, clothing, and foods shown.
Lesson 9
Different Modes of Transportation
Students are asked to look carefully through pages of A Life Like Mine to find examples of transportation in the pictures even though the book text does not talk about transportation, prompting them to get information from illustrations. In Activity 1 students match pictures of vehicles to word labels and fill in missing letters, using picture cues to identify words. In Activity 2 students view illustrated travel scenarios and choose or write the mode of transportation that fits each picture, using visual information to make decisions about travel.
Final Project
Differences Make the World Go 'Round
Students are asked to "illustrate each page by drawing or pasting a picture that represents the sentence," and pages include large blank boxes for drawings or pasted images next to written sentence prompts (e.g., Food, Hobbies, Homes, Clothing, Transportation, Holidays). The instructions explicitly tell students they can "print pictures from the Internet or cut pictures from old magazines" to pair with their written sentences. The student book cover also directs students to draw a picture of themselves and the child from the other country, reinforcing pairing of illustrations with textual descriptions.
3: Patterns
Unit 1: Identifying and Creating Visual Patterns
Lesson 1
What Is a Pattern?
The lesson asks the child to look at the cover, identify the title and author's name (words), and to read the title and guess what the story is about (using illustrations). The lesson directs the child to turn to specific pages and describe the types of patterns she sees and to explain patterns found on illustrated pages, and it has multiple activities where students complete and make patterns using pictures (cutting, arranging, and coloring images). The reading-aloud activity encourages the child to follow along with text while also examining pictures.
Lesson 6
Shapes and Patterns
Students read written pattern descriptions (Activity 2, Options 1 and 2) and then create the patterns with attribute blocks, including circling the beginning letter and sounding out each word. Students recreate and describe sequences of pictured shapes on the "Shapes and Patterns" sheets (Activity 1), verbally stating the order (e.g., "The first shape is a small circle...") and labeling shapes A, B, or C. Student pages present both pictured shape sequences and written labels (AABB, ABC, ABAB), asking students to identify and reproduce patterns from both visuals and words.
Unit 2: Patterns in Sounds, Words, and Actions
Lesson 1
Word Patterns
Students label pictures and match images to written words (Activity 1 Option 2 directions: "label the pictures on the lines provided" and circle repeating parts). Students cut apart and match illustrated words on the Bear Hugs word list and say pairs aloud (Activity 3 Option 1), connecting visual representations to word forms. Students copy or dictate animal names from the text and then sort those names into habitat groups (Activity 4), using words and images together to organize information.
Lesson 2
Making Word Patterns
Students fold the "It's Time to Rhyme" sheet so they cannot see the illustrations and complete each sentence using only the words, then unfold the sheet to check their answers against the pictures. Students glue a sentence and an illustration on each page when making their rhyming book, and they create their own sentences with rhyming words. Students are given picture books to examine and asked to identify and record words from the text that share sound patterns, noting groups that follow the same spelling patterns and groups that rhyme but are spelled differently.
Lesson 4
Sentence Patterns
The lesson includes illustrated word lists (Activity 1, Option 1) where nouns and verbs are shown with pictures that students cut out or copy to form sentences. Activity 4 asks students to read simple picture books, point to beginning letters and periods, and identify sentences with one subject and one action verb while copying sentences from books. Several activities (Making Sentences, Completing a Sentence Pattern) require students to use pictured nouns/verbs or match words to contexts.
Lesson 5
Story Patterns
Students cut apart and glue comic-style illustrations in sequence and label them beginning, middle, and end (Activity 2, Option 1). Students read a short story and then illustrate and describe what happened in the beginning, middle, and end, writing or dictating sentences to match their pictures (Activity 2, Option 2; Activity 3). Student pages present pictures alongside a short printed story, and students are asked to follow along while reading and then complete boxes that connect images and text.
Lesson 7
Making Sound and Action Patterns
Students cut out cards that include both images and associated words (smack, stomp, slap, clap, tap) and place them to form repeating sound patterns, then perform or listen to the patterns. One option explicitly provides pictorial cues paired with words for visual learners, while the other option presents word-only sequences, so students work with both illustrations and text when creating and following patterns. Students are asked to check that their created sequences repeat, linking the picture/word cards to auditory actions.
Unit 3: Patterns in Your World
Lesson 2
Patterns of Growth
Students draw the plant every few days and write a sentence to record its growth (Activity 1 and the Student Activity Page), which asks them to produce both illustrations and words for the same observations. Students label a plant diagram using words from a word box and the first letters provided (Activity 2), directly linking vocabulary to parts shown in an illustration. Students cut apart and order pictures of life cycles and paste them, and they are asked to paste in order the life cycle of a person and a dog (Activity 4), engaging with sequences shown in images alongside written stage labels.
Lesson 3
Night and Day
Activity 1 asks students to label three pictures of the Sun, Moon, and Earth and then color them, and the Student Activity Page includes illustrations with empty text boxes for labeling or notes. Activity 3 directs students to draw a picture of something they do during the day and then record or dictate a few sentences about that activity, and a corresponding "At Night" page asks for a drawing plus lines for text. The globe/flashlight experiment and video include visual demonstrations of rotation and day/night that students view and describe.
Lesson 4
Daily Routines
Students work with labeled pictures in Activity 1 ("get dressed," "eat breakfast," etc.) and cut and sequence those images to show a morning routine. In Activity 2 students both write sentences for four steps and illustrate each step (example: "A Routine for Dinner" with text steps and matching illustrations). In Activity 3 students pair icons with times on a daily schedule chart and are asked to record activities in words or simple symbols.
Lesson 6
Seasonal Weather Patterns
Students are asked to "fill in the missing seasons after studying the illustrations" on the Seasons and Months page, using pictures (snowflakes, flowers, umbrella, sun, leaves) to identify seasons. Students match month illustrations (e.g., December: Christmas tree, April: umbrella with raindrops) with season or weather words on the Weather Patterns page. The lesson prompts students to "discuss the illustrations associated with each month and what they symbolize," which has students interpret information conveyed by pictures.
Lesson 9
Counting Patterns
Students are asked to look at pictures of objects on the "Counting by Twos" page and count each set of illustrated items by twos, using pictures as the source of information. In the "How Many Clowns?" activity students place clown faces in a car as they listen to a story and fill in blanks, linking the spoken/written narrative to the visual representation. The student activity pages include illustrated grids and sequences that students must read (or interpret visually) to record numbers.
Lesson 11
Patterns in Graphs
Students are asked to circle the title and axis labels and to read the title and labels aloud, then explain what each label means and the purpose of the graph. Students color-code parts of graphs and charts (e.g., color days with two books orange and three books purple; color girls' names pink and boys' names blue; color boxes marked G and R) and answer questions such as "What does this chart tell us?". Students examine visual elements (bars, illustrations of T-shirts, sequences of shapes) to describe patterns and predict next items.
Final Project
Patterns All Around Lapbook
Students create mini-books that include both pictures and words: they draw or paste a pattern from nature inside the matchbook and write the title "Pattern in Nature," they draw and label stages under the flaps in the 3-flap book, and they write the days of the week on the fan book while also decorating blades with visual patterns. The lesson's skills list explicitly includes using pictures to support spoken messages and recording or dictating knowledge, indicating students will produce both illustrations and written words. Multiple activity pages and templates (matchbook, 3-flap, wheel, fan) require students to place images and words together in the same artifacts.
4: Change
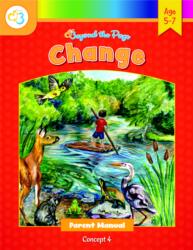
Unit 1: Changes on Planet Earth
Lesson 1
What Causes Change?
Students look closely at picture cards and match before-and-after pairs, deciding what changed between the two images (Activity 1). Students observe picture sequences and mark whether changes are fast or slow based on the illustrations (Activity 2). Students draw a before-and-after picture and then complete sentences describing the change, converting visual observations into written language (Activity 3), and the skills list includes reading or attempting to read their own dictated story and expressing ideas through writing and conversation.
Lesson 2
What Changed?
Students read Part 1: Things Change and answer text-based questions about physical and chemical changes (Activity 1), which engages them with information provided by the words. In Activity 2 and the Student Activity Page, students examine pairs of illustrations (tree to bare tree, caterpillar to butterfly, empty to full cart, doghouse to dog) and determine which attributes (weight, color, size, amount, location) changed, which engages them with information provided by pictures. Activity 3 has students make and demonstrate changes using real objects, reinforcing observation of changes from physical evidence.
Lesson 3
Changing Position
Students are asked to look at the book cover and explain what is happening in the picture and predict the book's topic, prompting them to draw meaning from an illustration. In Activity 2 students cut apart and sort illustrations into actions that require pushing or pulling, requiring them to interpret pictures to determine physical actions. In Activity 1 students use the index to find words like "gravity" and "inertia," locate the pages, and copy the sentences from the text, engaging directly with information provided by words.
Lesson 7
Living Things Change
Students look closely at paired illustrations (lizard and rabbit panels; before/after pairs) and are asked to describe the changes they observe. In Activity 2 students observe picture pairs and then circle words that describe the change (number, size, shape, place) and mark whether the change was fast or slow, linking pictorial evidence to word labels. Activity 3 asks students to create illustrated before/after boxes, showing they use pictures to represent changes and to pair those with categories or descriptions.
Lesson 8
Plants and Change
Students draw and label plant parts (Option 2) or assemble labeled cutouts of plant parts (Option 1), linking word labels to illustrations. Students cut out and glue pictures in order to show plant life-cycle stages (Activity 4) and create a folded diagram with images of seed-to-flower stages (Activity 3), using illustrations to represent sequence. Students also record observations from the plant experiment, comparing what they see (visual evidence) to their written predictions.
Lesson 10
Chemical Changes
The Student Activity Page presents six paired scenarios with accompanying pictures and checkboxes where students categorize each example as a chemical or physical change. Students are instructed to identify each change and then explain how they made each decision. The lesson displays images for items (e.g., new bicycle/rusty bicycle, apple/chopped apple, balloon/blown-up balloon) alongside the written descriptions.
Lesson 11
People Change the Environment
Students are asked to describe what is happening in each illustration on the "Humans Cause Environmental Change" page and to decide whether each change is positive, negative, or neutral. Students sort pictured items into a recycling bin or trash can after watching a video about recycling. Students are given written definitions and discussion prompts about reducing, reusing, and recycling to read and talk about.
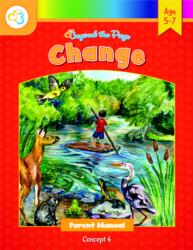
Unit 2: Characters Change
Lesson 3
Is It a Problem?
The guided reading includes a question that asks, "How does the author illustrate the problem at the beginning of the story?" with the expected answer "As a cloud or a storm," prompting students to attend to illustrations. Activity 1 asks students to look through the book, watch how the problem grows and changes in the illustrations, find the pages that contain the text for each prompt, and then illustrate the problem at different points in the story. The Beginning/Middle/End activity and accompanying storyboard images require students to use and organize visual scenes alongside story text to sequence events.
Lesson 4
Comparing Characters
Students are asked to consider illustrations as part of comparisons when completing Venn diagrams (Activity 1 directs them to think about "their personalities, their situations, their families, the illustrations in the books, etc."). Several activity pages include explicit illustration boxes for students to draw characters (Two Stories, Same Problem; My Favorite Story) and a reflective drawing task (I Change) that requires students to represent before/after states. The skills list also names identifying similarities in illustrations as an objective.
Lesson 5
The Raft
Students are shown the book cover and told that the author is also the illustrator, and they are asked to look through other picture books to find stories where a character tells the story, which requires attending to illustrations. Students complete a vocabulary matching page that pairs sentences with small images, and they glue illustrated characters, settings, and titles on the Story Elements pages, using pictures alongside words. Students create and decorate a small raft with symbolic drawings and are asked to sketch scenes from nature, practicing conveying meaning with images.
Lesson 6
Positive and Negative Change
The lesson's Skills section explicitly includes identifying similarities and differences "in illustrations" as one example of comparing texts. In Activity 3, students are asked to illustrate a cause-and-effect situation and then write or dictate one or two sentences describing the change. The materials include student activity pages and prompts that require students to produce and attach images (drawings) alongside written descriptions.
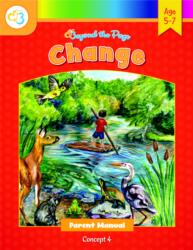
Unit 3: A First Look at History - Change Over Time
Lesson 1
People and Families Change
Students repeatedly examine and use photographs to order life events and describe changes (Activity 1 and Activity 4), answering questions about what they see in the pictures. Students create written descriptions (Activity 3 and Activity 5) and fill a Student Activity Page that asks them to write about the past and present while also drawing illustrations in provided boxes. Students compare visual measurements on a growth chart (Activity 2) and label ages/heights, connecting visual marks with written numbers and labels.
Lesson 3
Communities Change
Students are asked to point out and describe the pictures on the book cover and to describe what they see (Activity 1). Students match picture labels and read event labels to place events on a timeline (Activity 2, Option 2) and cut/paste illustrated events into chronological order (Option 1). Students examine pictures of different communities and are asked to point out differences in transportation, clothing, homes, and activities, and to number or sort illustrated community members (Activity 3). The skills list explicitly includes using pictures to support written and spoken language.
Lesson 4
Past and Present
Students cut out and place labeled illustrations (Ancient Rome, Medieval Europe, Ancient Egypt) on a timeline (Activity 1) and use picture clues to order homes, transportation, clothing, and school (Activity 5). Students are asked to point out differences they see in the illustrations (setting, clothing) and to answer questions after looking at pictures in each section (Activity 3 and follow-up questions). The skill list also asks students to predict story content by analyzing the cover and to use text features to locate information, which requires attending to both images and text.
Lesson 6
Predicting Future Change
Multiple Student Activity Pages pair illustrations (a cityscape, an ear with sound waves, a toothbrush, toys, and children interacting) with short written scenarios and questions that students read and respond to. Activity 3 asks students to draw a picture showing how they were before and after a change, and Activity 1 has students read scenario text and answer questions about future effects. Students therefore interact with both pictures and words while answering prompts.
Lesson 7
People of the Past
In Activity 2 students cut apart pictures and written descriptions of five historical figures, place them in chronological order, and are asked to point to the individual described after the descriptions are reread. Students then glue each written description beneath the corresponding picture, using the words to identify which illustration matches. Activity 1 also asks students questions (e.g., "How do you know?") that encourage them to use textual clues to determine whether a person lived in the past or present.
Final Project
My Past, Present and Future
Students are asked to write short sentences beside labeled prompts (e.g., "I was different because," "Now I am," "In the future I will be") and to add drawings or photographs in adjacent boxes on multiple activity pages. In Option 2, students write or dictate the sentences "In the past __________" and "Today __________" for each cultural element and then illustrate each side. The activity pages explicitly pair written lines with corresponding illustration boxes so students produce both words and pictures for the same content.
6: Reading

Unit 1: Semester 1
Lesson 1
Letter Sounds Review I
The lesson prompts students to use pictures to help read: Activity 5.3 instructs students to "encourage him to use the pictures provided to figure out words" and asks students to name what they see on the book cover. Activity 5.4 and the Writing Words activity require students to identify a pictured item (cat, map, mat, cap) and then say or write the corresponding word. The reader activity also asks students to do the action shown on each page as they read, tying illustrations to text meaning.
Lesson 2
Letter Sounds Review II
Students are asked to look at and describe the cover of the reader The Pig Can and to predict what the book is about (Activity 5.3). In the Beginning Letters activity (Activity 2.2) and multiple student activity pages, students identify pictures (e.g., igloo, net, ring) and write or supply the initial letter, using the illustration to name the item. In Day 5 writing and other pages, students identify pictures and then say the sounds and write the corresponding words, explicitly using images to support word identification.
Lesson 3
Letter Sounds Review III
Activity 5.3 ("What's Missing?") directs students to look at the picture next to each sentence to figure out the missing word and then write it in the blank. Activity 5.1 has students identify pictured items (e.g., log, jug, pot, dot) and then say the word slowly and write it under the picture. Activity 5.2 asks students to describe the cover of the reader and to read the book aloud while pointing to each word, linking illustrations with printed words.
Lesson 5
Adding s, More Word Families, Ending with ck
In Activity 4.3 (Reader #5 — Ducks Are Fun) students are asked to read the words and look at the picture on page 2 to try to figure out the meaning of the unfamiliar word "don," and then to answer which duck is having the most fun and why. In Activity 3.2 (Writing Words With s) students are directed to pay attention to how many objects are in each picture and write the correct plural word to match the illustration. Activity 5.1 Word Chains and other reader activities also require students to use pictures with text when reading the simple readers aloud.
Lesson 8
Blends with s
Students name pictures and match them to beginning blends in Activity 2.1, cutting and sorting picture tiles into columns labeled with blends. In Activity 5.1 students use pictures to fill in missing initial blends on word blanks, choosing the correct blend based on the image. In Activity 4.3 students point to each word as they read the reader and answer comprehension questions about the story.
Lesson 9
Blends with l
Students name and match pictures to words in multiple activities (Activity 1.2 sorting pictures into blend columns; Fill in the Blanks pages where images cue the missing initial blends). Students use images on Student Activity Pages to identify items (glass, cloud, slide, flag, etc.) and then write or select the corresponding words. In Reader #9 students are asked comprehension questions such as the color of flags and what kids do at the club, which can be answered using picture cues as well as text.
Lesson 11
Ending Blends
Students name and use pictures to identify words and ending blends in Activity 3.2, where they name each picture, cut out the images, sort them into columns by ending blend, and glue them to the page. Students read the reader At Camp (Activity 4.2), point to each word as they read, and answer comprehension questions about what the kids do at camp. Several student activity pages include illustrations paired with word labels (nd, mp, lf, nt) that students use when practicing or sorting word endings.
Lesson 12
Double ll, ss, ff, zz (FLOSS)
Students name pictures before writing target words on the "ss and ff Words" pages, using illustrations to generate and spell words (Activity 3.2). Students answer content questions about the reader Huff and Puff, including "What insects are shown in the book?", which requires attending to illustrated information (Activity 4.3). Several activity pages pair images with word tasks (LL word families, Alphabet Soup, ss and ff pages) so students use illustrations as cues to produce or read words.
Lesson 13
Glued Sounds ng and nk
In Activity 4.1 students look at pictures and use the pictured item to determine and write the missing digraph (the directions say to make sure he knows what each picture is showing). In the Fill-in-the-Blanks tasks students supply ang/ing/ong/ank/ink/unk endings based on the pictures (e.g., t(ank), k(ing)). In Activity 2.2 and 3.2 students read word-family pages that include pictures referenced when placing and gluing words, so students use pictorial cues to identify words during sorting and spelling tasks.
Lesson 14
Three-Letter Beginning Blends
Students are asked to use pictures on the "Fill in the Blanks" pages to identify words (Activity 4.1: "Make sure that she knows what each picture is showing") and to add the correct beginning blends to match those images. The student activity pages repeatedly pair pictures with incomplete words and prompt students to complete words using the blends listed at the top of the page. The reader comprehension questions (Activity 4.3) ask about actions in the story (e.g., what kids do at the pond), which encourages students to use the book's illustrations alongside the text to answer questions.
Lesson 16
R-Controlled Vowels (ar)
Students complete fill-in-the-blank pages where pictures correspond to missing blends (e.g., ba___, sha___) and are told to "make sure that she knows what each picture is showing." A student activity page description notes that students engage with sight words and illustrations that encourage interaction and comprehension. The reader activity asks students to answer the question on each page as they read, which likely requires using picture cues to respond.
Lesson 17
Semester Review
Students are asked in Activity 1.3 to listen to sentences (read aloud without showing the page) and then view the "There and Their" page with illustrations before underlining the correct word, which pairs spoken/written sentences with pictures. Activity 2.2 asks students to identify words/objects from pictures on the "A or AN?" pages, prompting them to use images to recognize the noun and select the correct article. Activity 4.1 asks students to point to or name characters in readers and talk about what the characters do, which engages students with both illustrations and textual content.

Unit 2: Semester 2
Lesson 4
More R-Controlled Vowels (er, ir, or, ur)
Activity 5.1 directs the child to "name the pictures before he begins working" and to fill in missing vowel pairs using the images (e.g., barn, fern, worm, fork, shirt). Multiple Student Activity Pages pair illustrations with incomplete words for students to complete, so students must use picture cues to identify and spell target words. The lesson also includes a reader (The Bird Is Third) that students read and answer literal comprehension questions about the text.
Lesson 6
Long e Spellings ee, ey, ea
Students are asked to name pictures before writing the corresponding 'ea' words (Activity 3.2), so they use illustrations to identify words. Several student pages pair sentences with drawings (e.g., "I see the monkeys at the zoo." and "The sea has many waves today.") that students read while looking at matching pictures (Activity 2.1 Long e Spellings). The reader What Do You Eat? includes pictures and asking students content questions (e.g., "What does the worm eat?" and "How many beans are the birds eating?"), which prompts students to refer to illustrated content when answering.
Lesson 17
Year-End Review
Students are asked to look at pictures and write one or two sentences about each picture (Activity 2.2 Sentence Writing), using the illustration as the prompt for their writing. In the compound-words activity students identify objects shown in pictures and spell the corresponding compound words using a Word Bank. Several Student Activity Pages explicitly present illustrations (dock with ducks, children playing soccer, images for compound words) that students must observe and respond to in writing or word-identification tasks.